Raspberry Pi 3 B+設定順序
- 下載 Raspberry Pi OS imager https://www.raspberrypi.org/software/
- 安裝並執行
- 設定好要的OS後,進行安裝
- 寫完後將SD卡退出,這時插回SD卡,於 boot 碟產生一個名為 ssh 的空檔案 (可用新增文字文件再改名),如此沒有鍵盤,也可以用ssh登入
- 將SD卡插入Raspberry Pi中,接卡網路線和HDMI及電源,啟動
- 待啟動完後,使用Angry IP Scanner等工具掃出其IP,使用Putty登入 (pi / raspberry)
- 更新:
- sudo apt-get update
- sudo apt-get -y upgrade
- sudo apt-get -y dist-upgrade
- sudo rpi-update (更新Firmware)
- sudo apt -y autoremove
- sudo reboot
- 其它package
- nslookup: sudo apt-get install -y dnsutils
- VNC (https://www.raspberrypi.org/documentation/remote-access/vnc/)
- 中文字型
- sudo apt-get install fonts-arphic* (文鼎全部)
- sudo apt-get install fonts-moe-standard-kai (教育部標準楷書)
- sudo apt-get install fonts-cwtex-yen (cwTex圓體)
- 輸入法
- sudo apt-get install -y fcitx
- sudo apt-get install -y fcitx-chewing (注音)
- sudo apt-get install -y fcitx-table-array30 fcitx-table-array30-big (行列30)
- sudo apt-get install -y fcitx-table-boshiamy (嘸蝦米)
- sudo im-config (設定)
- 日文字型、輸入法
- sudo apt-get install -y fonts-vlgothic jfbterm fcitx-anthy
- PDF reader / editor
- sudo apt-get install -y okular
- System Monitor (Monitorix)
- wget https://www.monitorix.org/monitorix_3.10.1-izzy1_all.deb
- 請注意上面的網址會變更
- sudo dpkg -i monitorix_3.10.1-izzy1_all.deb (會發生錯誤不用管它,下一行修復)
- sudo apt-get -yf install
- 修改 /etc/monitorix/monitorix.conf
- sudo vi /etc/monitorix/monitorix.conf
- raspberrypi = y
- sudo service monitorix restart
- Disable ipv6
- sudo vi /etc/sysctl.conf
- net.ipv6.conf.all.disable_ipv6 = 1
- net.ipv6.conf.default.disable_ipv6 = 1
- net.ipv6.conf.lo.disable_ipv6 = 1
- net.ipv6.conf.eth0.disable_ipv6 = 1
- net.ipv6.conf.wlan0.disable_ipv6 = 1
- sudo sysctl -p
- Static ip address (for wireless wlan0)
- sudo vi /etc/dhcpcd.conf
- interface wlan0
- static ip_address=192.168.1.201/24
- static routers=192.168.1.1
- static domain_name_servers=168.95.192.1 8.8.8.8 8.8.4.4
- Static ip address (for eth0)
- sudo vi /etc/dhcpcd.conf
- interface eth0
- static ip_address=192.168.1.3/24
- static routers=192.168.1.1
- Disable WiFi and Bluetooth
- sudo rfkill block wifi
- sudo rfkill block bluetooth
- 整體設定
- sudo raspi-config
- sudo rerboot
- Cacti 1.1.38 or later (Monitor; 內建的Cacti版本很舊)
- sudo apt-get install -y apache2
- sudo rm /var/www/html/index.html
- sudo apt-get install -y mariadb-server mariadb-client mariadb-common
- sudo apt-get install -y php7.0 php7.0-snmp php7.0-xml php7.0-mbstring php7.0-json php7.0-gd php7.0-gmp php7.0-zip php7.0-ldap php7.0-mcrypt php7.0-mysql
- sudo vi /etc/php/7.0/apache2/php.ini
- add date.timezone = Asia/Taipei
- sudo useradd -r -M cactiuser
- cd /usr/share/mysql
- sudo mysql mysql < mysql_test_data_timezone.sql
- sudo mysql
- mysql> create database cacti;
- mysql> grant all on cacti.* to 'cactiuser'@'localhost' identified by 'cactipassword';
- mysql> flush privileges;
- mysql> exit
- sudo mysql mysql -e 'grant select on mysql.time_zone_name to cactiuser@localhost'
- sudo vi /etc/mysql/mariadb.conf.d/50-server.cnf
- max_heap_table_size = 46M
- tmp_table_size = 64M
- join_buffer_size = 64M
- innodb_buffer_pool_size = 227M
- innodb_doublewrite = off
- innodb_flush_log_at_timeout = 3
- innodb_read_io_threads = 32
- innodb_write_io_threads = 16
- innodb_additional_mem_pool_size = 8M
- collation_server = utf8mb4_unicode_ci
- wget https://www.cacti.net/downloads/cacti-latest.tar.gz
- tar xfz cacti-latest.tar.gz
- sudo cp -rf cacti-1.1.38/* /var/www/html/
- sudo touch /var/www/html/log/cacti.log
- sudo chown -R www-data:www-data /var/www/html/
- sudo vi /var/www/html/include/config.php (find and replace)
- $database_type = 'mysql';
- $database_default = 'cacti';
- $database_hostname = 'localhost';
- $database_username = 'cactiuser';
- $database_password = 'cactipassword';
- $database_port = '3306';
- $database_ssl = false;
- $url_path = '/';
- sudo mysql -u cactiuser cacti -p < /var/www/html/cacti.sql
- sudo apt-get install -y snmp snmpd snmp-mibs-downloader rrdtool
- sudo systemctl restart snmpd.service
- sudo systemctl status snmpd.service
- sudo apt-get install -y build-essential dos2unix dh-autoreconf help2man libssl-dev libmysql++-dev librrds-perl libsnmp-dev libmariadb-dev libmariadbclient-dev
- wget https://www.cacti.net/downloads/spine/cacti-spine-latest.tar.gz
- tar xfz cacti-spine-latest.tar.gz
- cd cacti-spine-1.1.38/
- sudo ./bootstrap
- sudo ./configure
- sudo make
- sudo make install
- sudo chown root:root /usr/local/spine/bin/spine
- sudo chmod +s /usr/local/spine/bin/spine
- sudo vi /usr/local/spine/etc/spine.conf
- DB_Host localhost
- DB_Database cacti
- DB_User cactiuser
- DB_Pass cactipassword
- DB_Port 3306
- http://your_IP/install
- login with admin / admin
- Console -> Configuration -> Settings -> Paths -> Spine Config File Path -> /usr/local/spine/etc/spine.conf
- Console -> Configuration -> Settings -> Poller -> Poller Type -> Spine
- sudo crontab -u www-data -e
- */5 * * * * /usr/bin/php /var/www/html/poller.php
- done
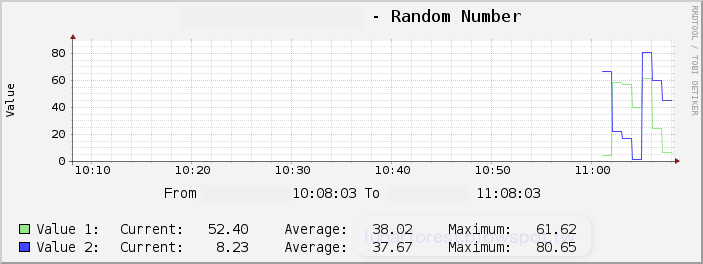
Cacti設完後結果


留言